

Roofs and roofing
How is a roof built, from the first measurements to handover?
Roof construction starts with accurate measurements and a design that specifies the geometry, supports, loads and sequence of layers. Each stage prepares the surface for the next. A neatly fitted flashing cannot correct a defect concealed beneath the covering. The order of work depends on the insulation and roof covering, which also influence the pitch, support spacing and edge details. Coordinate chimneys, access hatches and penetrations before ordering. Plan safe access for the crew, lifting of materials and weather protection while the building is open. The material schedule should include sheets or panels, flashings, fasteners, seals and rainwater goods.
In this guide
What should be agreed before the materials arrive?
Identify the components that must be made to measure. Before delivery, prepare a storage area that meets the product requirements. Long pieces need adequate support, and packs must be protected from moisture and surface damage.
How do you inspect the supporting structure?
Once the timber or steel frame is complete, inspect its connections, anchors and conformity with the design. Check levels, support spacing and straightness. Measuring the diagonals helps reveal whether a roof slope is out of square. Trying to correct a crooked frame with the roofing sheets can lead to misaligned laps and uneven edges.
Resolve differences between the design dimensions and the actual frame at this stage, especially for sheets cut to length. Inspect supports before they disappear beneath the covering. A structural member cannot simply be removed to make room for a service route or roof accessory.
When are the insulation and sealing layers installed?
The sequence depends on the roof design. Insulation can sit between or above structural members, or form the core of a sandwich panel. With above-rafter PIR insulation, check the board layout, joints and fasteners that transfer loads. In other systems, some work on the inside follows installation of the covering.
Each layer serves a purpose. Keeping out rain, preventing air leakage and controlling vapour diffusion may require different materials. Connections at walls and openings must be continuous. Select membranes for their position and function in the design. Adding more membranes without checking the build-up can compromise its performance.
How are the supports prepared and the covering laid?
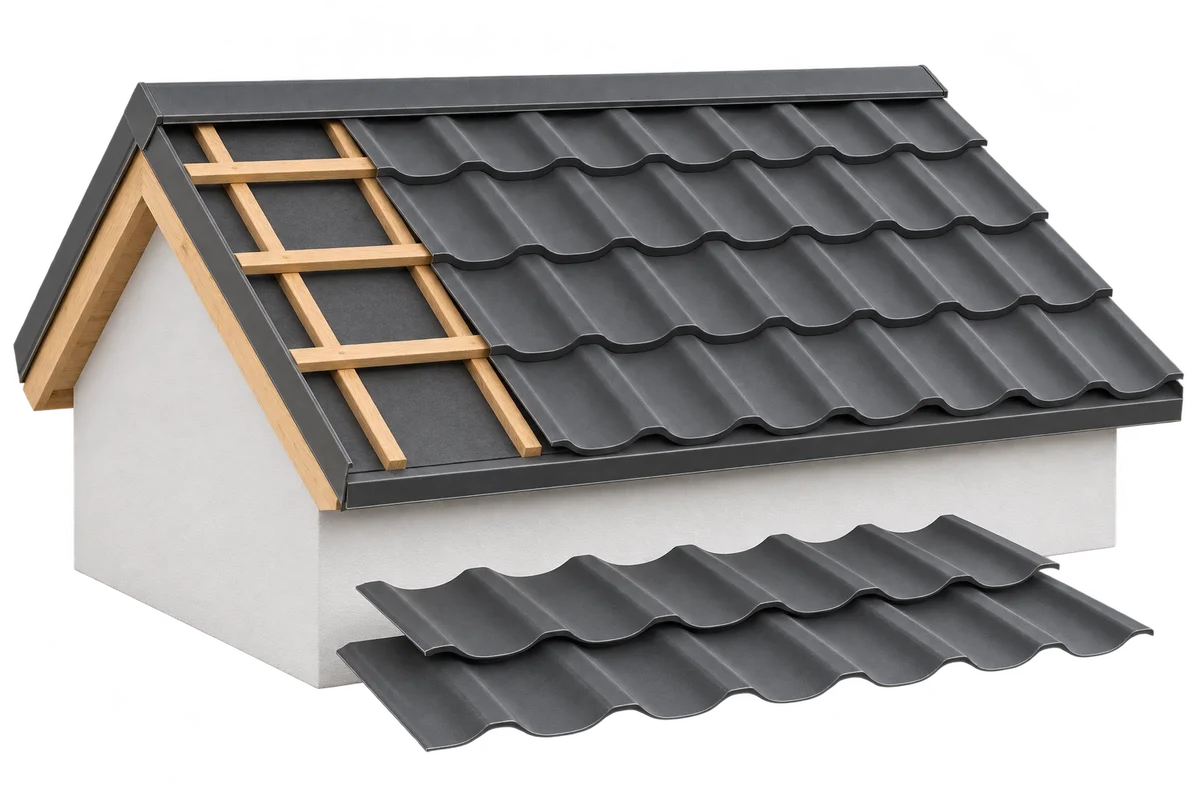
Choose battens, purlins or other supports to suit the product and the design. For tile-effect steel sheets, the module sets the batten spacing, although the eaves may have a separate detail. For T18 and T35 trapezoidal steel sheets, check sheet thickness and load tables. Insulated roof panels have their own bearing and joint details. Installation instructions for a single metal sheet do not cover these panel connections.
The first sheets set the direction for the rest of the covering. Check their alignment before fixing a larger area. Use fasteners suitable for the substrate and install them in accordance with the instructions. Remove swarf as you go. High-temperature cutting tools can damage the protective coating on steel sheets.
When are flashings and drainage installed?
Some eaves details and gutter brackets go in before the covering is complete. Other flashings close the assembly after the sheets have been laid. The sequence depends on which layer overlaps the next and where water should drain. The profile, bracket type and roof edge determine the appropriate installation order.
Ridges, hips, valleys and verge flashings must work with the ventilation paths and seals. Use the specified details at service penetrations. An excess of sealant cannot correct a poorly planned drainage path. Check maintenance access and the fixing of roof accessories before handover.
What should the final inspection cover?
Inspect the roof geometry, coating, joints, fixings and completeness of the flashings. Check that air and water can flow through the intended paths. Compare the finished work with photographs of the concealed layers. Record each defect and how it will be remedied. Several of these details cannot be assessed from ground level.
At handover, collect the product documents, maintenance instructions and warranty information. Agree inspection intervals based on the documentation and local conditions. Construction time depends on the size, shape and type of roof as well as the weather. A schedule with defined stages and inspections gives a more realistic picture than a fixed number of days for every roof.
Remove protective film within the time and by the method specified in the product documentation. Film left on too long can adhere to the coating and become difficult to remove. Handover is also a good time to mark the safe route for maintenance. Only the designated parts of the roof should be used for access.